

Editor’s Note: The original review was of the Pre-2019 Guide’s Pack, but has since been updated for the 2019 version which fixes some of the original issues we had with the pack.
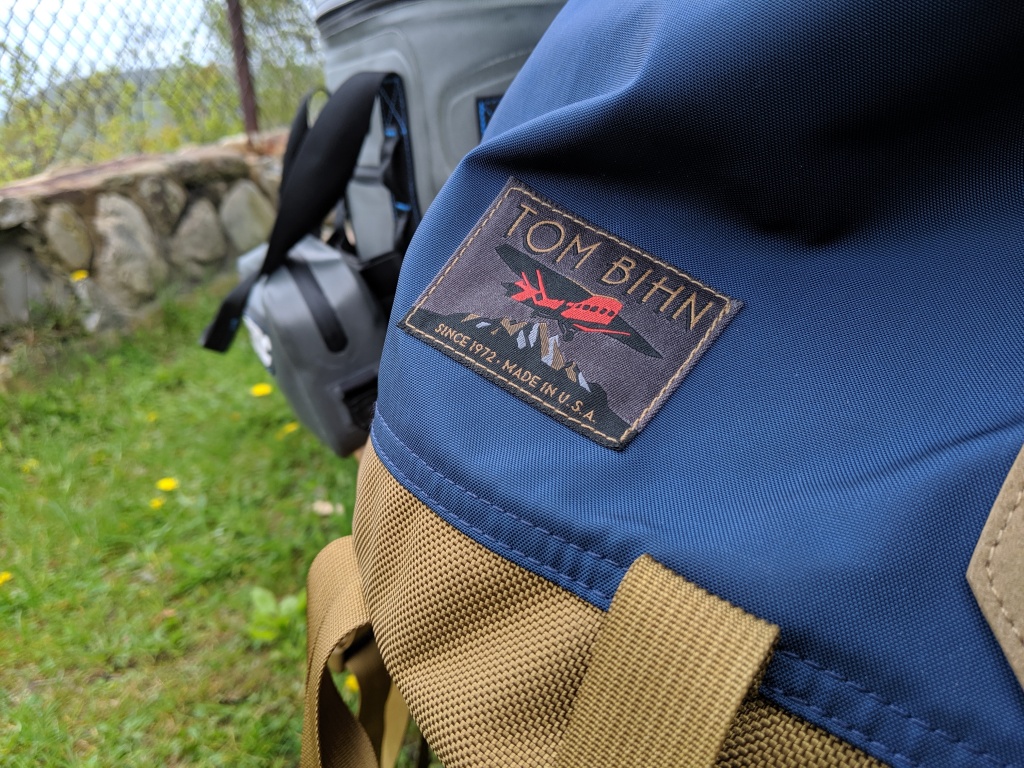
Tom Bihn is one of the most iconic backpack brands in the world. For everything from business travel to backcountry treks, Tom Bihn has been there and done that with bells on. Since 1972, they’ve been making everything in their lineup in Seattle, WA.
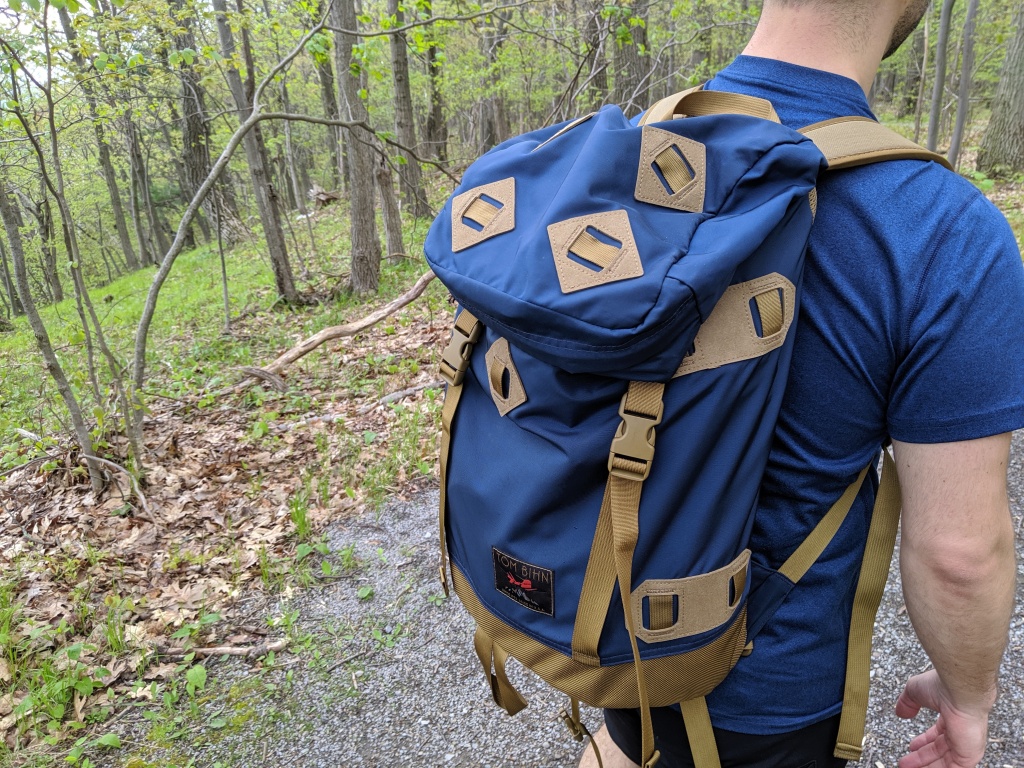
Tom Bihn was started by it’s namesake; Tom Bihn. Even today, Tom designs every bag and accessory alongside co-designer, Nik. This specific bag is The Guide’s Pack. It’s a love letter to the classic klettersack with some upgrades for a more modern age. I’ll preface this review with a single statement – this is a bag you’ll pass down to your grandchildren.
When we talked with Tom Bihn about reviewing this bag, I was excited at the challenge of it. It’s a bag that’s so outside of my normal rotation that I knew I would really have to get out there and use it in the way that Tom and his crew intended it to be used. So, I started planning and geared up for a weekend on the Finger Lakes Trail. It took a bit longer to organize than I would have liked, since I’m mostly a day-hiker or car camper, and the weather up here is pretty temperamental. But, after having the bag for a few months, and toying with it and the gear I was going to carry, I was finally able to set out and put The Guide’s Pack through its paces. We’ll not only be looking at The Guide’s Pack itself, but also some of the tailored accessories that compliment it.
Tech Specs
| Imperial | Metric | |
| Height | 21.7″ | 55cm |
| Length | 12.6″ | 32cm |
| Depth | 9.4″ | 24cm |
| Weight | 2.5lbs | 1.13kg |
| Capacity | 1900 cu. in. | 31L |
| Primary Materials | 420D HT Nylon, 1050D HT Ballistic Nylon |
Quality and Comfort
Anyone familiar with Tom Bihn’s products won’t be surprised to hear that no corners were cut in the manufacture of The Guide’s Pack. There’s nothing on this pack that isn’t of the highest quality, from the materials to the workmanship. I don’t imagine there is much I could do to this bag outside of normal use to injure it.
The main body of the bag is made of parapack, which is a 420d high tenacity nylon. This isn’t a new material – it was originally used in military parachute backpacks. Some people might raise their noses to that, given all of the modern materials on the market, but this parapack is really something. Believe it or not it’s almost similar in look and feel to one of the more modern (and my favorite) pack materials today; Arcteryx’s DONGJIN 630d HT Nylon used on the LEAF Courier 15. This isn’t a waterproof fabric, but it’ll have no problem shedding light rain, and I haven’t noticed it picking up any pet hair at all. That’s nothing to say for the really nice navy blue colorway they decided to use for this run.
The bottom exterior of the bag is a nicely contrasting coyote 1050d high tenacity nylon, which pays tribute to the leather bottoms of classic mountain packs. The internal area of the bag is entirely 420d, which means the bottom is dual-layered with 1050d on the outside, and 420d on the inside. For added protection, there’s also 6mm of closed-cell foam between the two layers.

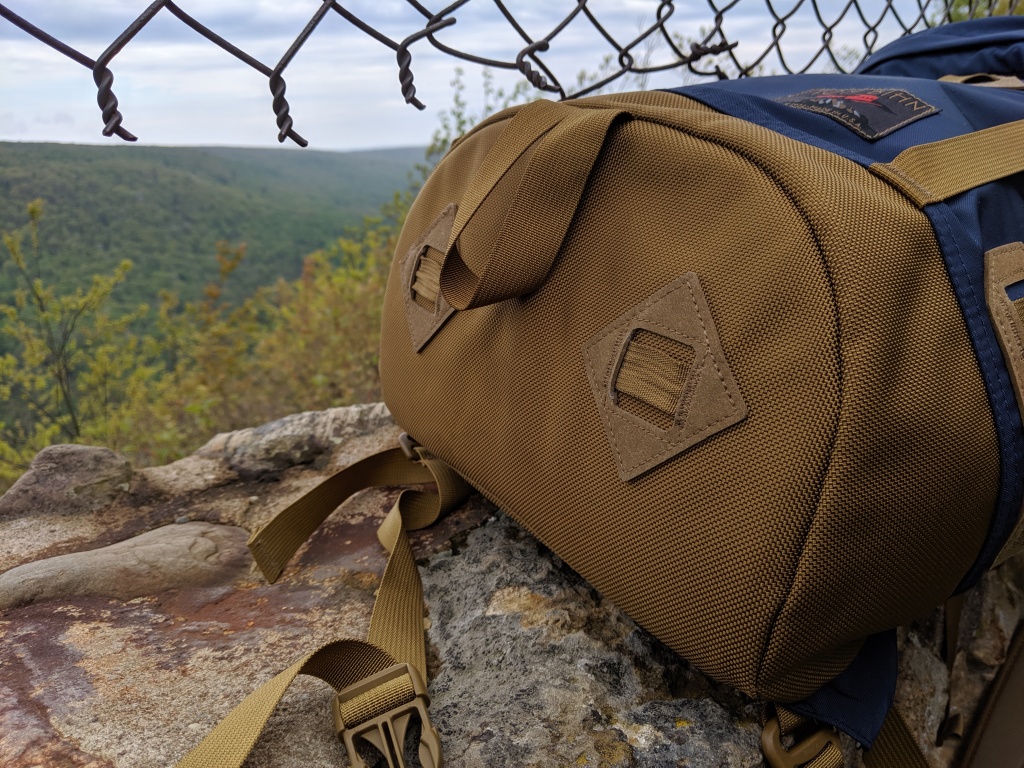
The Guide’s Pack has lash-points on almost every side of the bag – fifteen in total. Like many of the features on this pack, these are a rethought throw-back to the lash-points of old. Like the bottom of the pack, classic mountain packs often utilized leather. Since leather isn’t the most ideal material on a pack like this, Tom Bihn re-designed these points using bar-tacked nylon webbing reinforced with synthetic felt. These lash-points also act as attachment points for the pockets that were specially designed for The Guide’s Pack.

The back panel is made of Dri-Lex Aero-Spacer mesh, padded with 6mm of closed-cell foam, with a 1050d lumbar area which wraps back around to the bottom of the bag like I mentioned above. It’s also got an internal frame, made up of .055″ thick HDPE and a single, curved aluminum stay. Both the stay and the frame sheet are removable, allowing you to re-shape it as needed or to use the sheet without the stay. The frame is secured by six fins inserted into horizontal sleeves in the back panel of the pack. The separate fins allow the sheet to better move with you as you walk, and I found this to be generally true. It’s a really nice frame sheet setup.

While Tom Bihn has many thoughts on shoulder strap design, these just didn’t really work great for me. After two back-to-back ten mile days on the FLT, my shoulders felt overly raw. I found myself constantly adjusting the form and fit of the suspension (as suggested) without much success on day two. I will say that I’m not anywhere near an experienced thru-hiker, but another hiker with the group, using a Gossamer Gear Mariposa, had much less comfort issues throughout the weekend.
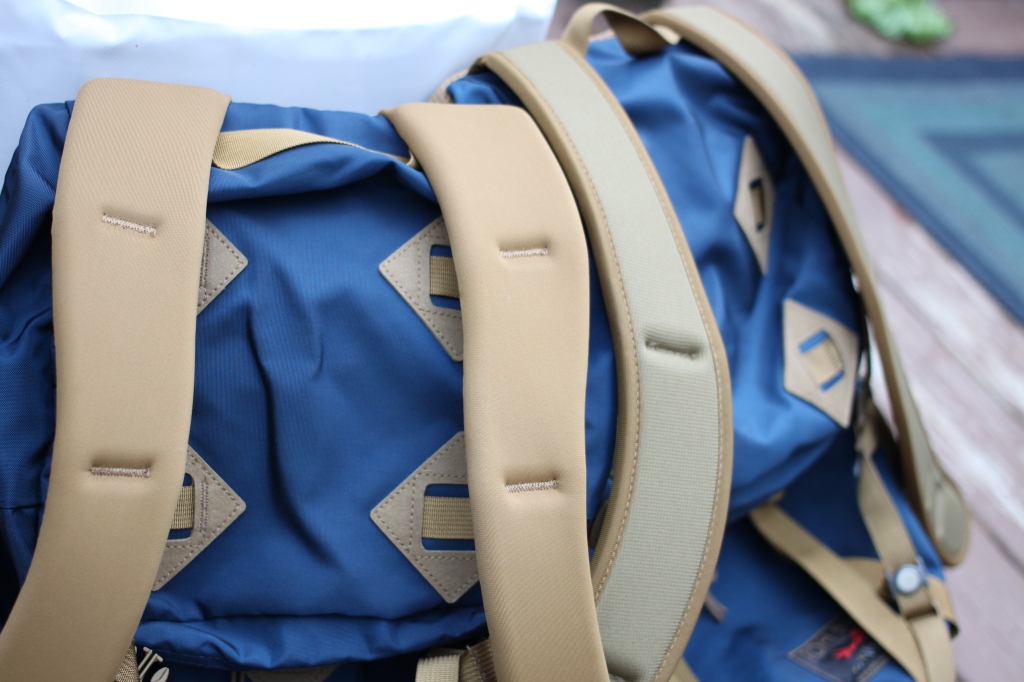
That said, they also didn’t work as poorly as I thought they would when first loading up. The straps are nicely shaped and padded with 10mm of closed-cell EVA foam. I would have loved to have seen just a little extra padding backed with that same airmesh used on the back panel. After a weekend with the pack, I found they needed just a slight bit more give. The Guide’s Pack also doesn’t come with load-lifters. I typically have a love / hate relationship with load lifters and have opinions™ on where they belong. I think that they belong here, and I found myself wanting to reach for the non-existent lifters throughout my trek. I suspect that most of my above issues with the straps are not as applicable to more dialed in, lighter-loaded packs or single day trips. Your mileage may vary.
The Guide’s Pack ships with a very simple 1″ waist belt. It does just fine, but at $30 I’d recommend upgrading to the padded hip belt if you’re going to be carrying any kind of load. What’s nice about this upgrade is that your old 1″ belt doesn’t go to waste. With the attached Gatekeeper clips, you can turn any of the Guide’s Pack pockets into a hip-pack. This is really useful when you want to leave camp to refill your water or gather firewood. I found I really liked this feature and in general just how modular every piece of kit from Tom Bihn was. I kept the pockets attached to the pack, but I did use the waist strap alongside a Side Effect pocket with similar results.

While the padded belt is a nice upgrade, I do wish it had either lash-points or integrated pockets. There’s a lot of real-estate on these wings that I think could be utilized better. Instead of keeping items I wanted easy access to on the belt like one usually would, I ended up having to add some weight with my Hill People Gear Snubby Kit Bag to keep snacks and such. I also recommend the same small padding upgrades as with the shoulder straps here.

The top of the pack has a non-removable lid, made up of the same material as the main body of the bag. The lid itself is one big pocket, accented along the top with some lash-points for whatever may not fit in your bag. I do wish the top lash-points were situated in a way that allowed me to use one of the Guide’s Pack pockets though. The leads pocket in particular I thought would make a great top-mounted pocket. Of course I can still lash it, but using the provided annex clips would have been cool. Now that I think about it, this same change would improve the bottom lash-points as well.

Guide’s Pack 2019 Updates
The most recent iteration of the Guide’s Pack fixes some of the above issues that we had with the older model. Most noticeably, Tom Bihn has upgraded the straps to their new Edgeless EV50 1/2″ Shoulder Strap which made their debut on the new Synik packs. These new straps are a great upgrade on an already great pack. If you already own this bag and use it often, I would recommend upgrading.


Tom Bihn also upgraded the standard hip belt from a 1″ to a 2″ belt. This makes the included bet a bit more useful, but makes the old padded belt obsolete. If you want a padded belt for the 2019 Guide’s Pack, you’ll have to buy a brand new one.

And while load lifters didn’t make it on to this iteration of the pack, Tom Bihn has provided their thoughts on this matter.
Organization
If you can’t tell from the photographs, the lash-point locations are as follows:
| Front | 1 |
| Left Side | 4 |
| Right Side | 4 |
| Top | 4 |
| Bottom | 2 |
The front lash-point exists to strap in your ice axe, hatchet, or trekking poles. Tom Bihn sells a matching axe strap specifically for this, but you can always use whatever 1″ piece of webbing you have lying around. You can loop longer items through the webbing loop at the bottom of the pack to keep them from swinging when secured here. At one point in my trip I moved my Z-Seat here to fit better under a particularly tight rain cover.

On either side of the pack you’ll see four lash points that, as mentioned above, also act as attachment points for any of the pockets Tom Bihn sells for the pack. For this review I used a Left Pocket and a Leads Pocket. While both look similar, they couldn’t be more different. The left pocket is completely empty and housed my 2L hydration bladder just fine. The main body of the bag has no separate compartment for a bladder, nor does it have bottle pockets, so this was the only convenient way I found to carry accessible water without rigging a bottle to my shoulder strap. The Left Pocket would also fit a standard 1L Nalgene if that’s your thing.

The Leads Pocket fell a little flat for my use. The main attachment points inside are made of static nylon webbing rather than elastic loops. While the webbing is more durable in the long run, it’s impossible to slip anything into them that isn’t relatively flat. I found I could only fit really tiny items here or items with clips attached. For example, you’re not fitting a round flashlight without a clip. There are also a few elastic loops on the spine designed to fit small items like pens or pencils.

The Leads Pocket has two zipper compartments inside. One behind the webbing loops and one on the opposing side split into two compartments of its own. The split pocket is nice for organizing small, loose items, but I found that items even as small as my car key fob slipped from the top section to the bottom due to a small gap between the divider and the zipper. You won’t lose anything, but it did make me worried that I lost my car key at one point. In the future I think I would forego the Leads Pocket in favor of something smaller and lighter with more flexible organization. I would almost prefer a Leads Pocket that was half the size of the current one, taking up only two lash-points.

Both of these pockets come separate from the Guide’s Pack at $60 for the Leads Pocket and $40 for either the Left or Right pockets. All of these pockets have a hidden zipper that faces the pack when attached. I found these useful for passports, maps, or a small flask since they share volume with the pocket. The Leads Pocket main compartment has a dual zipper covered by a flap, while the other pockets have a single zipper covered by a flap. The flap does a good job of keeping any rain out, but I found that it made the zippers relatively difficult to manipulate. It might detract from the classic look of the pack, but I would have rather seen something like an Aquaguard zipper instead of a flap.

The lid / brain of the pack is generously sized. I was able to keep an Arc’teryx Beta SL, a small Magpul DAKA medkit, and 3-4 bars in here with room to spare. The zipper is of similar design to the Left and Right Pocket – a single zipper with a covered flap. It’s positioned so that the volume of the lid is above it. In use, I found that it was difficult to grab something out of it without something else almost falling out. I’d rather have the zipper positioned so that the bulk of the volume was below it, creating more of a tub for your items to sit in. Like above, I’d also rather see an Aquaguard zipper rather than a flap, as it was similarly difficult to operate, especially with one hand. I’d also make it a dual zipper.

The lid has four lash-points on top. As mentioned above, I wish these were re-designed slightly to accommodate a Left/Right or Leads pocket. Other than that they work as advertised. I kept my Thermarest Z-Seat lashed here with some shock cord. The underside of the lid has two relatively small zipper compartments. These worked nice for car keys, bars, and similarly smaller items, as they don’t have much volume.

The bottom of the pack has only two lash points. I had to enlist the help of webbing-wizard Mel Terkla of PocketUp to help me stabilize one of their Mini Pods, which I used to store my sleep system. This entailed using the Lash Straps from Tom Bihn together with the g-hooks of the Mini Pod to strap my gear from the bottom lash-points up to the compression straps to keep it from swinging into my butt with every step. Adding a second set of lash-points on the bottom, like on the lid, would really help stabilize the things you generally want to carry down there, like a sleeping pad.
The main body of the bag, like many top-loaders, is a black hole. The closure is like an old-school military duffel, crowned with static cord and a cordloc to secure the contents. The main flap / brain also buckles over the top of this compartment, giving it some extra protection from the elements. I was unsure of it at first but I grew to like the simplistic closure system. It’s quicker and simpler to use than a zipper or other similar system, especially with gloves on, and it’s much easier to field repair if necessary, adding to the longevity of the bag.

I do, however, wish there was some extra organization in here, in the form of a hydration sleeve and hanger. It’s easy enough to rig one up to the internal grab handle at the top of the compartment, but then you’re losing that grab handle and you still don’t have a sleeve. I don’t like placing bladders in areas where leaking could damage my gear. You could solve this by using a dry-sack or trash compactor bag inside of the pack to shield your gear, but a bladder sleeve would have been an improvement. And although I mentioned that the Left / Right pockets are great for holding a water bladder, you then have to make sure you counterbalance that weight on the other side.

What’s Perfect
- If you’re looking for a modern interpretation of the klettersack, look no further. This is a solid looking and performing bag.
- Only long term use will show for sure, but the durability of this bag seems second only to that of quality 1000D military haulers, and with a much lighter curb weight.
- The attachment system is simple and works great with the intended pouches.
- The abundance of lashing points gives an easy way to scale use up for weekend long treks or down for quick day hikes.
- This pack seems to carry more than the advertised 31L would entail. If I had to guess without seeing a spec sheet, I would have said 40L.
What’s Not
- This isn’t an ultralight, or even lightweight bag. By itself, the bag is 2.5lbs, and as reviewed with the Left and Leads pockets, it was 3.63lbs. Possibly more with the upgraded belt.
- The Guide’s Pack has a base price of $260USD. As reviewed, with the upgraded belt, two pockets, and various straps, it tipped the scales at $405USD. Though given the quality, longevity, and USA manufacturing, I don’t think the price is unfair.
- The shoulder straps need some tweaking as far as padding and load management goes.
- The upgraded, padded belt could use some attachment points or pockets, and the lash points on the top and bottom could be tweaked a bit.
Wrap Up
The Tom Bihn Guide’s Pack is a welcome blast from the past. Instead of just reproducing what once was, Tom and his crew really set out to make something new and special. The thought and care they put into this and all their bags is even more evident if you read through their blog, which is a wealth of knowledge on all things bag and bag manufacturing related. In a world of crossover packs and ultralight gear, the Guide’s Pack stands alone as a modern example of one of the bags that started it all.

If you’re looking for something a little different to add to your outdoor pack rotation, the Guide’s Pack is an easy recommendation whether you’re starting a short thru hike or just going for a day at the park. The Guide’s Pack retails for $260USD and is, at the time of this publication, unavailable for purchase as it is undergoing an upgrade. You can sign up to be notified when the 2019 version has been released at the above link. We’ll also be taking a look at it when it becomes available.
Editor’s Note: The Guide’s Pack and all accessories were provided by Tom Bihn as samples for review purposes. The content of this review was not shared with Tom Bihn before publishing. Our reviews are unbiased and never modified to keep a brand happy.


Thanks for the post!
LikeLike
Hi, what is that coyote pouch that you have lashed to the bottom of the pack here https://theperfectpack.com/wp-content/uploads/2019/05/img_20190512_103705-1.jpg?
LikeLike
NVM I see it listed here
LikeLike